🎯 Scenario 3: Updating a Classifier with Further Annotated Data
Tooltips: Many menu items and dialog options in SimBA have tooltips. Hover over a label or control to see a short description.
📖 Overview
SimBA provides several scenario-based tutorials. This tutorial covers Scenario 3: improving an existing classifier by adding more training data. You have already generated a classifier (e.g. in Scenario 1) and want to refine the classifier with additional annotated videos. The goal is to produce an updated classifier that includes both the original training data and your new annotations, so the updated classifier can generalize to the novel setup.
You are ready for Scenario 3 if:
You have a trained classifier (from Scenario 1), a classifier received from another lab, or classifier data downloaded from the SimBA OSF repository, and you want to improve the classifier by adding more training data.
You are willing to annotate additional videos so the updated classifier uses both the original annotated data and your new annotations.
Prerequisites:
Pose-estimation tracking files exist for the new videos you plan to annotate (DeepLabCut, SLEAP, or other supported formats).
You have access to the previously annotated CSV files (from the original training project) and, if the classifier came from elsewhere, the video metadata for those videos—see Part 1 below.
Notes:
Using someone else’s classifier or new recording conditions: If you received a classifier from another lab or changed your recording setup, you will usually get better results by creating a new classifier that includes training examples from your own setup. Classifiers can generalize, but they perform better when the training set includes examples from your behavior and equipment.
Operational definitions: Use clear, consistent definitions when annotating. See mouse and rat examples for resident–intruder protocols.
Sharing a classifier: If you plan to share a classifier, share all of the following so others can use, validate, or extend it:
Operational definitions — So recipients know exactly how each behavior was defined and can annotate consistently if they add data.
project_folder/csv/targets_inserted— The CSV files for every video used in training. These hold the behavioral labels; without them, others cannot retrain the model, run learning curves, or reproduce your classifier.project_folder/logs/video_info.csv— Video metadata (resolution, pixels per mm, fps) for those same videos. SimBA needs the video metadata for feature extraction and for the project to run correctly.
Learning curves: SimBA can generate learning curves to show how the classifier performs as you add more data. See Scenario 1 — Step 7: Train machine model and the scikit-learn learning curve example.
In this scenario you will: (1) locate or back up the previously annotated CSV files; (2) create a new project that contains only the new videos and pose data you want to add; (3) load that project and run the full pipeline (video parameters, outlier correction, feature extraction, behavior labeling) on the new data; (4) copy the old annotated CSVs and update video_info.csv so all training data is in one project; (5) train a new classifier on the combined dataset. SimBA does not incrementally update the old model—SimBA trains a brand-new classifier using all of the combined annotated data together.
📊 Hypothetical dataset
Same as in Scenario 1 and 2: three days of resident–intruder testing between aggressive CD-1 mice and subordinate C57 intruders. Each day has 10 pairs of mice, for a total of 30 videos across 3 days. Recordings are 3 minutes long, in color, at 30 fps. In Scenario 3 you assume you already trained a classifier on a pilot set (e.g. 20 videos) and now want to add more annotated videos (e.g. 5–10 extra) to improve the classifier.
Property |
Value |
|---|---|
Experiment |
Resident–intruder: aggressive CD-1 vs. subordinate C57 intruders |
Days |
3 days of testing |
Pairs per day |
10 pairs per day, 30 videos total |
Video specs |
3 min, color, 30 fps |
🗺️ Workflow at a Glance
Part 1: Locate previously annotated CSV files
Part 2: Create a project with new data
Part 3: Load project and process new tracking data
Part 4: Add previously annotated CSVs and update video_info
Part 5: Generate a new predictive classifier
📂 Part 1 — Previously annotated CSV files
Before you create a new project or add new annotations, you need to locate and secure the previously annotated CSV files that were used to train the original classifier. You will bring the previously annotated CSV files into your Scenario 3 project in Part 4 so that the new classifier is trained on both the old and the new data.
What to find: The annotated files live in project_folder/csv/targets_inserted of the project where you (or someone else) trained the original classifier. There is one CSV per video; each file contains pose coordinates, extracted features, and the behavior labels you created in the SimBA behavioral annotation GUI (e.g. which frames or bouts are “Attack,” “Sniffing,” etc.). If you are continuing from Scenario 1 or Scenario 2, open that project’s folder and go to csv/targets_inserted. Copy the annotated CSVs from targets_inserted to a safe backup location or note their path—you will copy them into your new project in Part 4.
Important
Your annotations are valuable. The files in targets_inserted represent substantial human effort: frame-by-frame (or bout) labels that define what the classifier learns. They cannot be recovered from the trained .sav model alone. Back them up, keep them in version control or a secure share if you collaborate, and avoid overwriting or deleting them. If you share a classifier, the targets_inserted files are what let others reproduce and extend your work.
If the classifier came from someone else (e.g. another lab or the SimBA OSF repository) and you want to add more training data, you need:
The targets_inserted CSV files from the project where the classifier was created.
Video metadata for the videos used to train the classifier: resolution, pixels per mm, and fps. SimBA stores the video metadata in
project_folder/logs/video_info.csvof that same project. You will merge the video metadata into your Scenario 3 project in Part 4.
You do not need CSVs from any other folder (only targets_inserted). You do not need the original video files or extracted frames that were used to create the original classifier.
By the end of Part 1: You know where the previously annotated CSVs (and, if applicable, the original project’s video_info.csv) are located, and you have backed them up or noted their path for use in Part 4.
🆕 Part 2 — Create a project
Create a new SimBA project that will hold only the new videos and pose-tracking data you want to add to the classifier. Do not import the original pilot or previously annotated videos here—only the new footage and its pose CSVs. The project-creation workflow (project name, body-part configuration, workflow type, behavior names) is the same as in Scenario 1 — Part 1: Create a new project; see that section for step-by-step instructions, including Import videos and Import tracking data.
Important
Unique file names: The new videos and new pose-estimation files must have different file names from the previously annotated videos. If a new file has the same base name as an old one (e.g. Mouse1_Day1), SimBA can overwrite or confuse files when you add the old CSVs in Part 4. Use distinct names (e.g. Mouse1_Day4, Pilot_extra_01) for the new set.
Important
Classifier names must match. When you create the project, in the SML Settings (machine learning settings) section, set the behavior / classifier name(s) to be exactly the same as the classifier name(s) used for the previous classifier (e.g. BtWGaNP). The new classifier you train in Part 5 will use the same feature set and behavior labels; if the names differ, SimBA will not recognize the combined data correctly.
By the end of Part 2: You have a new SimBA project whose csv/input_csv/ (or equivalent) and videos/ folders contain only the new videos and their pose-tracking files, ready for processing in Part 3.
🔧 Part 3 — Load project and process your new tracking data
In Part 2 you created a project that contains only the new videos and their pose-tracking files. In this part you load that project and run the same preprocessing and labeling pipeline as in Scenario 1 on the new data only: load project → set video parameters (calibration, fps) → outlier correction → feature extraction → label behavior (annotate the new videos in the SimBA annotation GUI). When you are done, each new video will have outlier-corrected pose data, extracted features, and behavior annotations, and SimBA will have written one CSV per new video into project_folder/csv/targets_inserted. Do not add the old annotated CSVs yet—that happens in Part 4.
Follow the steps below in order. Each step links to the matching section in Scenario 1 for full instructions.
Step 1: Load the project
Load the project you created in Part 2 so SimBA uses the correct project folder and config. Go to File → Load project, click Browse File, and select project_config.ini in the new project folder from Part 2.
→ Full instructions: Scenario 1 — Step 1: Load project config.
Step 2 (optional): Further imports
If you need to add more new videos or tracking files to the new project after creation, use the Further imports tab (Import videos, Import tracking data). For Scenario 3 you typically already imported everything when creating the project in Part 2, so you can skip the Further imports step unless you are adding more files.
→ Full instructions: Scenario 1 — Step 2 (optional): Further imports.
Step 3: Set video parameters
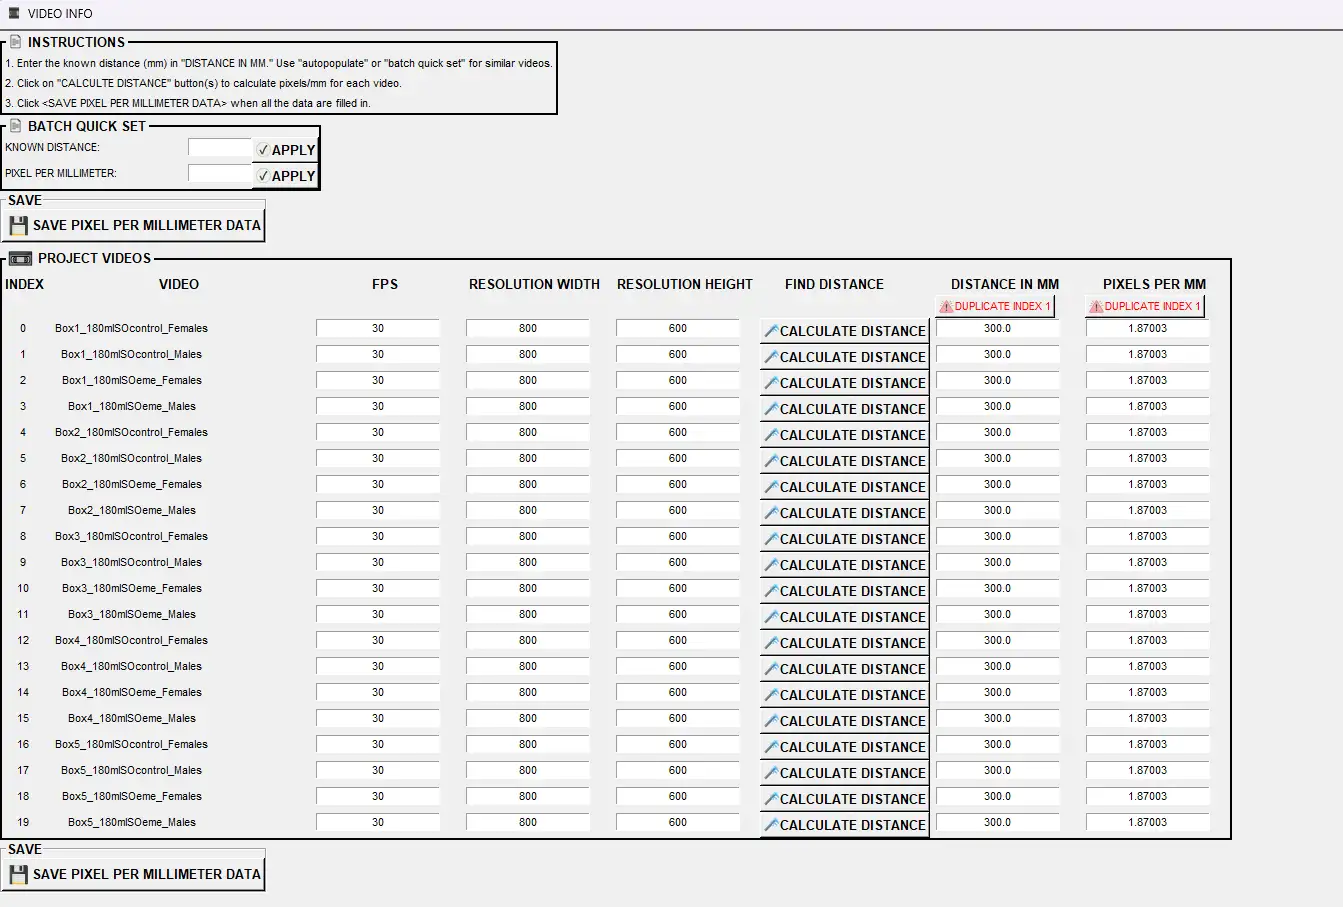
Set resolution, pixels per mm, and fps for each new video so SimBA can compute features in real-world units. Calibrate using the same method as in Scenario 1 (e.g. known distance in mm, pixel picker).
→ Full instructions: Scenario 1 — Step 3: Set video parameters.
Step 4: Outlier correction
Run outlier correction on the new pose data so implausible jumps do not distort features or labels. Use the same movement and location criteria as in your original project if the setup is the same.
→ Full instructions: Scenario 1 — Step 4: Outlier correction.
Step 5: Extract features
Run feature extraction so SimBA computes distances, angles, movements, etc., for each frame of the new videos. Use the same body-part configuration and workflow as the original classifier so the feature set matches.
→ Full instructions: Scenario 1 — Step 5: Extract features.
Step 6: Label behavior
Annotate the new videos in the SimBA behavioral annotation GUI: mark the start and end of each behavioral bout for each classifier (e.g. BtWGaNP). Use the same operational definitions as for the original training data so the combined dataset is consistent.
→ Full instructions: Scenario 1 — Step 6: Label behavior.
By the end of Part 3: You have (i) outlier-corrected pose data for the new videos, (ii) features extracted for the new videos, and (iii) behavior annotations for the new videos (each new video has a corresponding CSV in project_folder/csv/targets_inserted). For example, if you added 5 new videos, you should see 5 new CSV files in that folder. Do not add the old annotated CSVs yet—that happens in Part 4.
📥 Part 4 — Add the previously annotated CSV files to your project
You now have a project whose project_folder/csv/targets_inserted folder contains only the CSVs for the new videos you just annotated in Part 3. In this part you add the previously annotated CSV files (from Part 1) and update video_info.csv so that the project has all training data (old + new) in one place. SimBA will use this combined set when you train the new classifier in Part 5.
Step 1 — Copy the old targets_inserted CSVs. Go to the folder where you stored or located the previously annotated CSV files in Part 1. Copy those CSV files into your current project’s project_folder/csv/targets_inserted directory. After this, that folder contains both the new annotated CSVs (from Part 3) and the old annotated CSVs (from Part 1). Do not remove or overwrite the new files.
Step 2 — Update video_info.csv. The current project’s project_folder/logs/video_info.csv currently has one row per new video only. It does not yet include the videos that were used to train the original classifier. SimBA needs one row per video that has a CSV in targets_inserted (resolution, pixels per mm, fps) so that feature extraction and training use the correct metadata. To add the missing rows:
Open the video_info.csv from the earlier project (the one you used in Part 1) and copy its data rows (the rows that correspond to the previously annotated videos).
Open the video_info.csv in your current project’s
project_folder/logsfolder and paste those rows into it (e.g. below the existing rows). The file should now have one row per video that has a CSV intargets_inserted(all new + all old videos).
The result should look similar to the following (videos can have different resolution, px/mm, and fps):
Note
The Video column (first column) in video_info.csv must contain the exact video names that match the CSV filenames in project_folder/csv/targets_inserted (without the file extension). If a CSV is named Mouse1_Day1.csv, the Video column must have Mouse1_Day1 for that video’s row.
By the end of Part 4: The folder project_folder/csv/targets_inserted contains CSVs for all training videos (old + new), and project_folder/logs/video_info.csv has one row per such video with correct metadata. You are ready to train the new classifier in Part 5.
🤖 Part 5 — Generate a new predictive classifier with the new dataset
You now have all annotated data (old + new) in project_folder/csv/targets_inserted and an updated video_info.csv with one row per training video. In this part you train a new classifier on this combined dataset. SimBA will build a brand-new model (e.g. a new random forest) using every annotated video; the old .sav file is not modified—you are creating a new classifier file that replaces the old one for future use.
What to do: Follow Scenario 1 — Step 7: Train machine model in full. In the Run machine model tab, click SETTINGS to open the train settings window; the full list of parameters (algorithm, estimators, test size, train/test split type, undersampling, oversampling, class weights, learning curves, SHAP, etc.) is in the Scenario 1 — Train settings subsection. When you are done configuring, run TRAIN SINGLE MODEL (GLOBAL ENVIRONMENT) (Mode 1) or TRAIN MULTIPLE MODELS (ONE FOR EACH SAVED SETTING) (Mode 2) as in Scenario 1.
Where the output files are saved:
Mode 1 (single model): The new classifier is saved as
{behavior}.sav(e.g.BtWGaNP.sav) inproject_folder/models/generated_models/. Evaluation outputs (classification report, feature importance, learning curves, precision-recall curve, etc.) go toproject_folder/models/generated_models/model_evaluations/.Mode 2 (batch / multiple configs): Hyperparameter configs are saved as CSVs in
project_folder/configs/. Trained models (.sav), evaluations, meta copies, and train/test index logs go toproject_folder/models/validations/(and its subfolders).
By the end of Part 5: You have a new .sav classifier trained on the combined (old + new) annotated data. You can then:
Validate the new classifier on a video that was not used for training: Scenario 1 — Step 8: Validate model on new data.
Run the new classifier on new experimental data: Scenario 2 — Part 3: Run the classifier on new data.
Visualize predictions (classification videos, Gantt charts, heatmaps, etc.): Scenario 2 — Part 5: Visualize results. You can only visualize on videos for which you have feature-extracted data in the project.
Congratulations! You now have an updated classifier that includes more training data. To add another batch of experimental data to your project, see Scenario 4.
➡️ Next Steps
Scenario 1 — Validate the new classifier or refine the new classifier further with more annotations.
Scenario 2 — Run the classifier on new experimental data and create visualizations.
Scenario 4 — Add the next batch of experimental data to your project.
Bugs and feature requests: Please help improve SimBA by reporting bugs or suggesting features—either open an issue on GitHub or reach out on Gitter.
Author: Simon N